Tag Archives: writing tips

How to Read Like a Writer: Boost Your Storytelling Skills

read like a writer - find out how

My latest work in progress (WIP) had me stumped. I loved most of the book, but the beginning had me second-guessing myself. It wasn’t the plot as much as it was the writing. I thought I was introducing my world to my audience, but it fell flat. Try as I might, I couldn’t streamline the information dump, the narrator’s voice sounded a little off, and the telling was a bit lacklustre. That was when I thought of my read-alikes and started to read like a writer.

I have often cited books like The 100, Wool, The Hunger Games, and Wayward Pines as my inspirations, and those books were resounding successes. So, I returned to re-read them to see if they could help me with my problem. When I did, I made sure to read like a writer.

What is reading like a writer?

Reading like a writer is very different than reading for pleasure. Rather than read for pleasure, start to question the author’s choices.Your ultimate goal is to figure out why the author wrote the way they did. Some of the questions you might ask include

  • establishes tone and voice
  • conveys elements of the narrator’s character
  • shows instead of tells
  • explains the narrator’s backstory without resorting to information dump
  • explains the setting without resorting to information dump
  • builds suspense toward the climax

Here’s what I learned by revisiting my read-alikes.

The 100: begin in medias res

read like a writer - The 100.

The 100 begins with Clarke, the eighteen-year-old heroine and point of view (POV) character, in a jail cell, awaiting her next beating. The plot begins in the middle of the story, with Clarke already in peril. This helps to build suspense. It makes the audience wonder why she is being treated so horribly. Our curiosity is piqued when she leaves her cell, and we can’t wait to see what will happen next.  

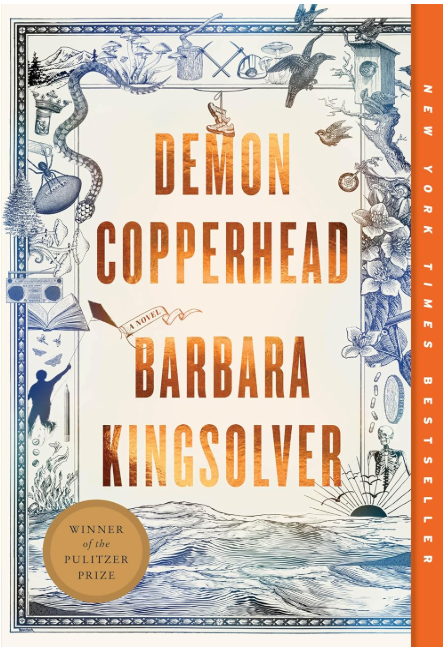
Demon Copperhead: it’s okay to use sentence fragments

In Demon Copperhead, Barbara Kingsolver uses sentence fragments almost exclusively. This helps the audience to see inside Demon’s head. It uses a technique similar to stream-of-consciousness to make the reader feel as if they are reading his thoughts. Because we are privy to Demon’s uncensored thoughts, it helps the reader easily bond with the character.

read like a writer - Demon Copperhead

The Hunger Games: how to build a world without information dump

read like a writer - Hunger Games

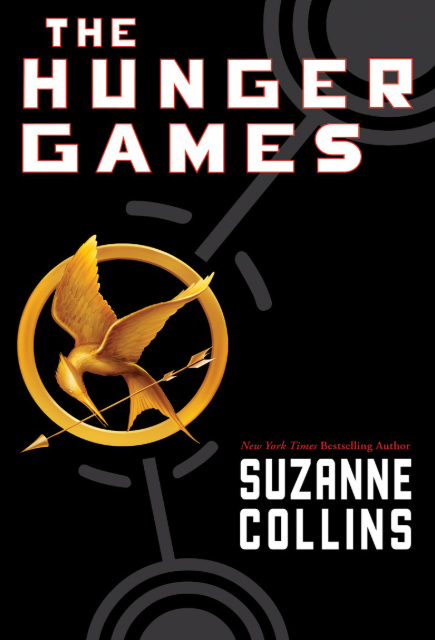
The start of The Hunger Games is a masterclass in establishing setting in a sci-fi dystopian world. With a few strategically placed hints and comments, Suzanne Collins introduces the dystopian backdrop of the novel as well as Katniss’s character as the narrator. We understand her powerlessness and reserved acceptance of her situation. We also admire that she is willing to do anything for her family, including sacrificing herself, if it means their lives will be more comfortable. At the same time, Collins tells us the dangers of the world she’s created through Katniss’s eyes. The novel flows beautifully, maintaining a consistent pace, and we are given a lot of information without feeling it is being dumped on us.

Wool: how to establish suspense with flashbacks

Hugh Howey’s Wool begins in medias res. It continues for two chapters before flashing back three years, showing what has led to Holsten, the sheriff, being sent to clean. By skipping back and forth in time, Howey establishes suspense. The reader cannot wait to see the events leading up to the sheriff, the person normally sending people to clean, to clean himself. The story uses hushed conversations about forbidden things to firmly establish Wool as a dystopia. The time shifts help build curiosity—the reader knows where the story is going, but not how it gets there, which keeps us turning pages.

read like a writer - Wool

Key takeaways

After spending some time reviewing my look-alikes and re-reading some of them as a writer, I was able to break free of my writer’s block and revise my work. This included

  • changing a scene to begin in medias res
  • breaking some of my longer sentences into sentence fragments that made sense in the context
  • streamlining how I established my setting
  • cutting out duplicate ideas
  • deleting information already established
  • moving other bits of information (to where they were more apropos)
  • using one or two flashbacks where the reader already knows what had happened, and the time shift helps clarify events

I’m not going to lie. Radical editing—all the chopping and revision—was the most painful experience I could imagine, but I really like what I came up with!

How to read like a writer

Here are some things to keep in mind when reading like a writer.

  • Focus on read-alikes for your story. Take a look at stories similar to your own and try to determine what about the narrative voice made them so successful.
  • Be specific with the questions you ask. If your difficulty is composing dialogue, read with an eye to dialogue. If your difficulty is eliminating information dump, read to see how other authors give background information about characters and settings without it.
  • Try modelling the author’s voice. Using mentor texts is a good way to try on someone else’s voice. Read a chapter of your mentor text like a writer. Pay attention to the way the author tells the story. When you are done, try to write a section of your own story using the other author’s voice. You might hate the resulting hybrid voice. But you might also love it.

Reading like a writer—studying the way bestselling authors structure their plots, create their stories, incorporate literary devices, and establish setting—turns each book you read into a master class in writing, helping you grow as a writer and refine your narrative voice.

Deep Point of View

It is said there are three sides to every story: yours, mine, and what really happened. Writing in a deep point of view allows your narrator to tell their side. It lets your reader know what the narrative character thinks by filtering events through the lived experience of their backstory. It also uses interior monologue to show how the character interprets plot events.

Deep point of view, also known as limited point of view, comes in two varieties: first and third. This post takes a closer look at what point of view is in general—and specifically limited point of view—and how you can use it to go deep in your narrative.

What is point of view?

Point of view is the filter through which the story is told. Whether it is first-, second-, or third-person, point of view refers to the thoughts, experiences, perspective and opinion of a story’s narrator.

First-person point of view

Told using first-person pronouns, the narrator of a story told in first-person is limited to reporting only on what they can reasonably see, hear, feel, think, and know. In other words, they cannot report on how other characters experience events or what they think because they are limited to what the point-of-view character can perceive.

Third-person point of view

A third-person narrative can be written with an omniscient (know-all, see-all) or a limited narrator. The only difference between third-person limited and first-person limited is that third-person point of view uses third-person pronouns. Similar to first-person limited point of view, the narrator can only report on what the point-of-view character can reasonably see, hear, feel, think, and know.     

How to write in a deep point of view

Put yourself in your narrator’s shoes. When you write, imagine that you are the point of view character. As such, your narrator can use the other characters’ body language and tone of voice to infer what they might feel or think, but they cannot know for sure.

Show instead of tell

Going deep into a character’s point of view also uses showing instead of telling to help describe body language and sensory information so the reader can infer what is happening in a scene. For example, Mabel is the point of view character. Johnny is her friend. The text

Johnny was nervous.

is a prime example of telling instead of showing: the narrator tells the reader that Johnny was nervous instead of showing how Mabel knows this. It is also a good example of what not to do in a limited point of view—how can Mabel know with certainty that Johnny was nervous?

Johnny seemed nervous.

This is a little better when using a deep point of view. Mabel cannot know for certain that Johnny was nervous, but Mabel can infer that Johnny seems nervous. This way, it is clear that it is Mabel’s interpretation that Johnny is nervous.

Johnny cleared his throat. He looked down at his shoes and focused on the cloud of dust kicked up by his shuffling feet. He cleared his throat again.   

This example uses showing to let the reader know what Mabel is seeing. It does not draw conclusions (“Johnny is nervous). Rather, it details Johnny’s body language as Mabel sees it. It also makes good use of showing to describe Johnny’s movements and leaves it up to the reader to infer that Johnny is nervous.

Why use deep point of view?

Deep point of view puts the reader into your narrative character’s head as it telegraphs their experiences, thoughts, and emotions. It allows the reader to know the character’s mind for a greater sense of intimacy. In other words, the reader comes to know and identify with the point of view character, which increases their sense of empathy. This makes it easier for the reader to immerse themselves in the story, feeling as if they are connected to the point-of-view character and experiencing the action in their shoes.    

Key takeaways

Using a deep point of view to write in the persona of your point of view character creates an immersive experience for your reader. Not only will they put themselves in the point of view character’s shoes, but they will walk the miles of your plot in them as if they themselves were the character.

When you write in a limited point of view, you are inside your narrator’s head. Avoid using tags that say “I thought” or “he wondered” when possible. The entire manuscript essentially reflects the narrator’s thoughts.

Avoid using the collective perspective: They saw the fire, and they panicked. Though this can be inferred, your narrator cannot know for certain that the other characters’ experiences are all identical. Ernie might have been looking elsewhere.  Jane might have volunteer firefighter training. All Mabel can say for certain is that she did these things.  

Remember to limit yourself to what your point of view character can reasonably know, see, think, hear, and feel. Try to show instead of tell. Details matter. Describe them through the point of view character’s eyes. Weave in some of their lived experience or backstory, as well as their interpretation of events as they unfold.   

Putting it into practice

Here is a simple exercise you can use to write a brief scene in deep point of view.

  1. Create an outline of your point-of-view character. Take 5-10 minutes to brainstorm their backstory.
  2. Picture the setting of your scene. Take 5-10 minutes to describe it.
  3. Imagine your character in the middle of the scene. What do they see, hear, feel, or smell? Where were they been before the scene begins? Where are they going next? Do they have time before their next destination, or do they feel rushed? Is the space quiet or bustling? What is your character’s mood? Are they dealing with a crisis or something more mundane? Are they alone?

Take 10 minutes to write your character’s interior monologue. Your scene should be brief, covering no more than a minute or two in time.   

Revision for Consistency

Revising, revision

Even the best laid plans often go awry. It’s true. No matter how much planning or plotting you might do for your work in progress (WIP), the characters soon develop minds of their own and take you to places you never thought you’d go. So you let them go wherever they want and say whatever they want to say, and your book is better for it, but the moment you let them go off-book, you are opening yourself up to a host of plot holes. This is where your first revision comes in.

Last week, I typed “The End” on my latest WIP, Phoenix Station. But it wasn’t the end. Last week only marked the beginning of my first editing pass: Revision.

I’m an editor, and I’m really good at finding inconsistencies in my clients’ plots. Now is the time to put away my author’s cap and don my developmental editor’s one for my own book. In keeping with that spirit, today’s post is all about revision.

Milanote for Outlining

I’m usually more of a pantser than a plotter, but at some point, I always wind up plotting the rest of the book out. Given its plot, I started writing Phoenix Station as a planner. I started out with handmade notes and ramblings, refined that into a word processed chapter summary, and broke that down even further when I stumbled upon Milanote.

revising, revision
Milanote column with notes

In the months since discovering Milanote, it’s become one of my staple tools for developmental editing. Milanote is similar to an endless bulletin board on which you can stick “columns” and add “notes” to layout your book. I like that everything is on the desktop in front of me. It becomes a living document of the progress of my writing.

Finding Plot holes

My first pass is to tie up all loose ends I might have created along the way, aka plot holes. As I revise, I catalogue each chapter in a separate “column.” I list plot events in a bulletted list and reserve a “notes” section for questions that need to be answered on my next pass through the document. I highlight terms, character names, and the names of places so I will be sure to use the same terminology throughout. Text messages are important in my story, so I also highlight each of the strategically placed cryptic messages my character received. This makes it easier to locate later, though Milanote’s search function helps.

Revise for Consistency

When revising your document, I recommend making several passes. The first pass should be devoted to consistency. This applies to descriptions of characters and places as well as the internal structure of the world you have built (especially important for sci-fi and fantasy). I also edit for grammar and word choice as I go. Each pass through polishes my work even more. Creating a separate document that functions as a “story bible” for your work will help. I’m using Milanote, but you could use Word if you prefer.

Next Steps

What happens next depends on what I find in my first pass. I might need another revision dedicated to plugging the holes in my first (and second) draft. I might need to look at diction, imagery, symbolism, foreshadowing or something else. The important thing to note is that I won’t know where to go next until I complete this draft.

Stay tuned to follow my journey as I take Phoenix Station from first draft through to published (fingers crossed) bestseller!

4 Tips for Showing the Possessive Form of a Proper Noun

Apostrophe word or phrase in a dictionary

One of the things I see in my editing is that many authors are unsure as to how to show the possessive of a proper noun ending in S. Here are some things to remember to clear up this confusion.

Tip 1: When you have a name that ends in an S, add an apostrophe to show belonging, but only if the apostrophe S is not pronounced.

The ball belongs to Sanders.

It’s Sanders’ ball.

NOT: It’s Sander’s ball. [the S is a part of the name and cannot be separated to add the comma]

Tip 2: If you would pronounce the S to show the possessive, you must add an apostrophe S at the end of the name.

The ball belongs to Cyrus.

It’s Cyrus’s ball.

Tip 3: If a family name ends in S and you want to show the possessive for the whole family, add es’ to the end of the name.

The ball belongs to the Sanderses. [the whole of the Sanders family]

It’s the Sanderses’ ball.

Tip 4: Limit the apostrophes to one per name (or word).

It’s Cyrus’s ball.

NOT: It’s Cyrus’s’ ball.

Keeping these tips in mind as you write is sure to help you avoid these mistakes in the future. It has been said that, on average, it takes about a month to build a habit, so the more you practice applying these tips, the quicker these rules will become second nature.

If you are still unsure of whether you are using apostrophes to show the possessive form of proper nouns, be sure to use a grammar-checker like the ones built into Microsoft Word or Google Docs or an AI grammar-checker like Grammarly to help you with this.